I am happy to say your votes have helped me reach the fourth round of Project Food Blog. I am so grateful and hope you enjoy this entry. I would love your continued support of voting for me this week. Thank you!
"Girls aren't supposed to hook worms!"
I can still remember my great-grandfather saying those words to me as we went fishing at a small pond my grandparents owned when I was a little girl. Over the warm Florida summers, I would often stay at their farm to help with the housework and any gardening I was able to handle. When I had some free time, I would take my great-grandfather down to the pond to go fishing. The pond was semi-surrounded by old brush and trees, with a giant rock near the middle where my cousins and I would hop out of the canoe to rest on, to just enjoy being outside. The pond was full of bass which my grandfather fed, so at certain times of the day the fish would gather at one spot to feast on millet.
My great-grandfather wasn't able to finesse a worm onto a hook anymore, so I would grab a big earthworm and slide it onto the fish hook for him before adding one to my own line. He apparently wasn't used to girls doing the dirty work, and I still laugh at his surprise. He was proud of me though, especially when we were able to catch a fish and bring it back to show off our success.
Fish was always something my family enjoyed - not only catching, but preparing and eating as well. Our family reunions often involved a fish fry, with an assembly line of family members cleaning, cutting, and cooking fish. The two main types we enjoyed were bass and catfish since those are the two breeds my family stocked in their ponds.

Living in the Florida Panhandle, however, has introduced me to new types of fish though, like Red Snapper. It's a prized fish of the Gulf, with a delicate flavor and firm flesh that can be used in a variety of recipes. It's also common to find it fresh off the boats nearly every day at a local fish market, which is where I pick up mine.
When selecting fresh, whole fish, it's important to find one that has clear eyes and a firm body. These are good signs of a healthy fish straight from the water. The red snapper I picked up was gutted on the boat, but otherwise cleaning and filleting it was up to me - which is how I like it. It's so nice to be outdoors, preparing my dinner from scratch. I love getting to watch my dog play around outside and seeing her intrigued by what I'm doing. Not often am I able to slow down and appreciate the little things, and this process takes me back to my childhood and simpler times. It's a skill I'm proud to know.
Smoking fish on cedar planks goes back at least hundreds of years, which is what many Native American tribes in the Northwestern United States are known for. The smoking process infuses a natural and richer flavor into the fish. Although salmon is best known for smoking, cooking over a fire with a cedar plank can be used for both meats and vegetables. I decided this would be a fun way to cook my red snapper, and give me another excuse to use my little grill before it gets too cold.
It's usually easier for me to visit a local hardware store and have a piece of cedar cut. I have found it's cheaper and the pieces can be cut specifically for the size of your grill. My plank is 12 inches by 7 inches, just big enough for one fish fillet. Always remember to ask for untreated wood that has no chemicals added or sprayed on at all no matter your source. It's possible to reuse the wood as long as it's not too charred or cracked, too.

Allow the wood to soak for at least four hours, although soaking the night before is best. I start with hot water to make sure the wood expands to soak up as much liquid as possible. Just place something heavy on top to keep the wood submerged.
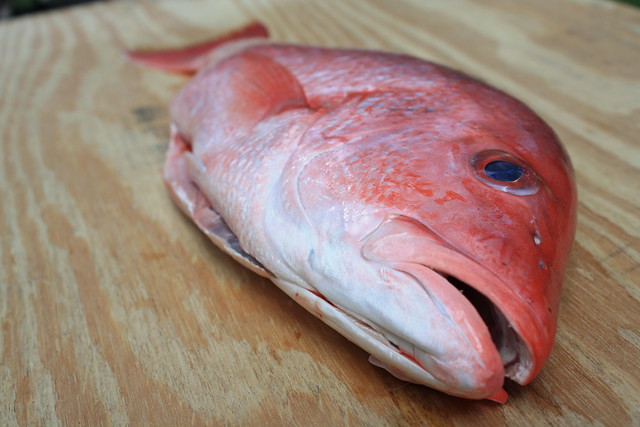
To fillet the fish, I'm used to working outside. The clean up is easier and all the little fish scales that go flying are acceptable outdoors. The photos below are not bloody since the innards were already removed, but in general, filleting a few fish isn't very gory. The tools that you need to fillet are a pair of scissors, pliers, and a sharp, flexible knife.

When you're ready to start, begin by removing all the fins.
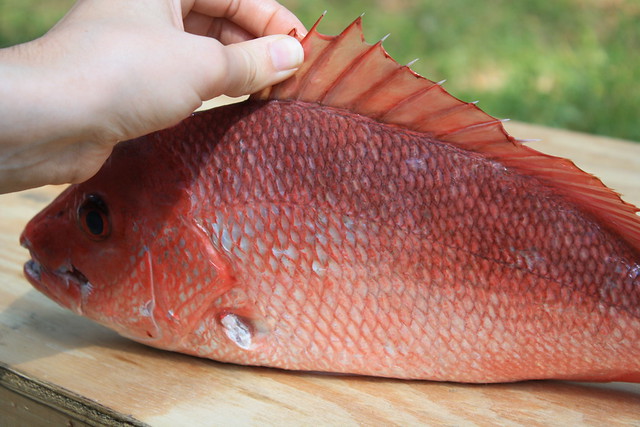
Red snappers have sharp spikes that need to be removed to make sure you don't get poked.
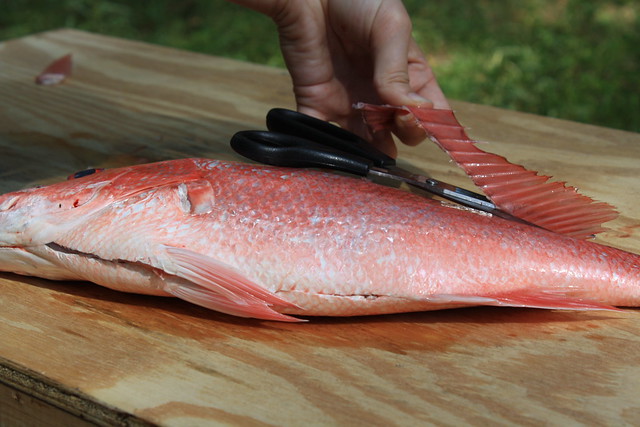
Go carefully and just snip them off, and do not rub your hand where the fins were since it's still sharp. You're just trying to get the fins out of the way, not make the area smooth.
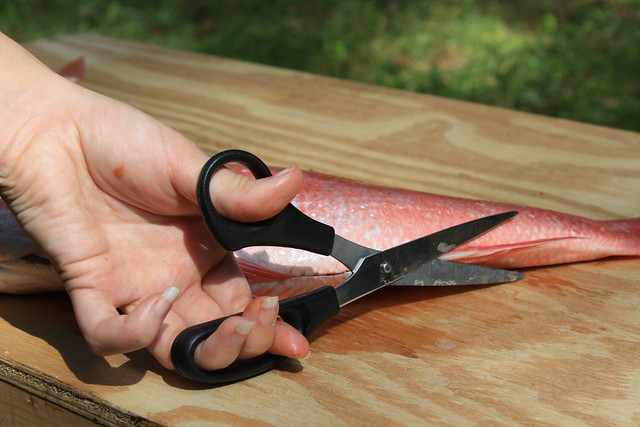
Make sure you get all the fins on both sides.

Next, use the back of your knife to descale the fish on both sides. Just rub the back of your knife quickly towards the fish head. This is the opposite direction of the scales and it will pop them off.
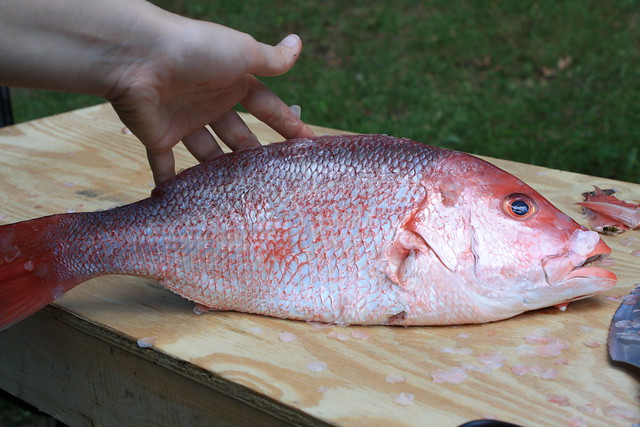
Use your hand to feel the skin and make sure they're all gone. Go ahead and lift the fish up a little or turn it if needed to get all the scales by its belly and dorsal fin...er, where the dorsal fin used to be.
At this point I like to hose down my workbench to make sure none of those little scales stick to the fish fillets since they are hard to see.
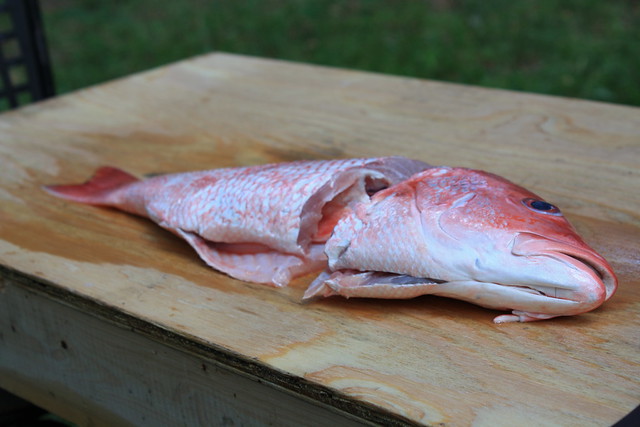
Next, use your knife to make a clean cut through the fish just behind where you removed the pectoral fins. Then make a firm cut through the spine to completely remove the head.

Now it's time to cut your first fillet. Take your knife and cut from the front to the fin, right at the spine. The first few strokes will be the toughest since you'll be cutting through the ribs.

Keep the blade at the spine and try to slice with as little sawing motion as possible to not rip the fillet.
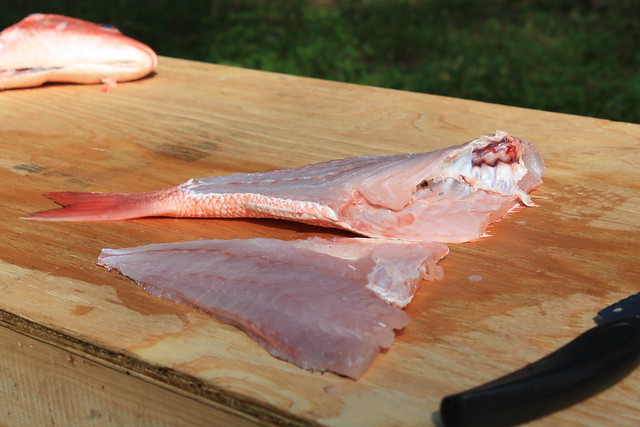
Congrats! You've made your first fillet.
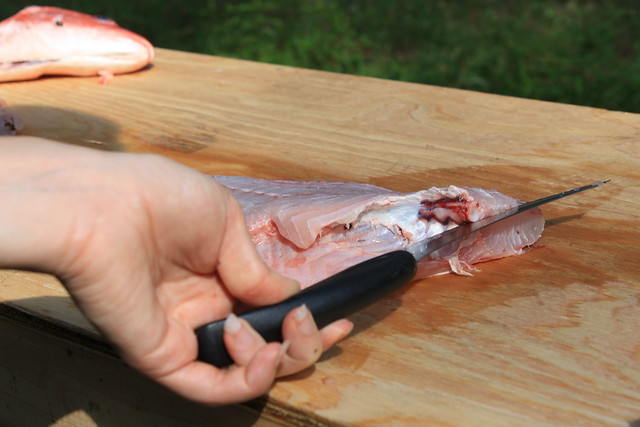
Next, leave the fish as is to make the second fillet.

For this cut, also remain at the spine and try to keep the blade pointed up to remain at the spine.
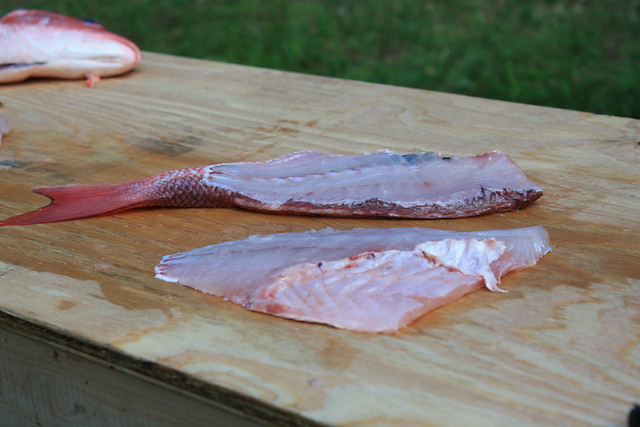
Great job! Your second fillet.

The fillets have some ribs which need to be removed. This is important to feel around and make sure you get them all. You can either use pliers to remove the pin bones, or...
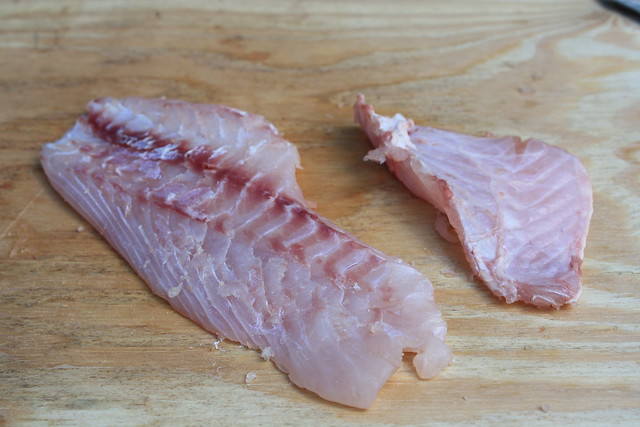
You can slice off the piece with the ribs and use it to make fish stock along with the head and spine.
The skin of the red snapper is edible, but you're welcome to remove it if preferable. Just keep the fillet flat with the skin on the board. Take a sharp knife and slide it along the very bottom to remove the skin. Some pieces may remain which can be cut off.

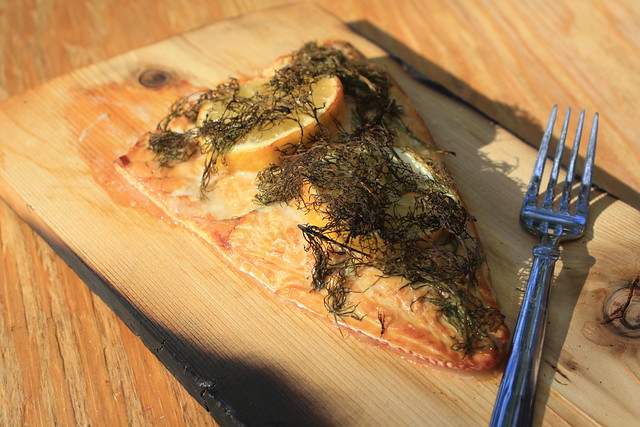
Now we're ready to cook your fresh fillets of red snapper. Remove the cedar plank that has been soaking in water and lay the fillet skin side down. I like to top mine with lemon slices and dill, but you're welcome to use any seasoning you like.
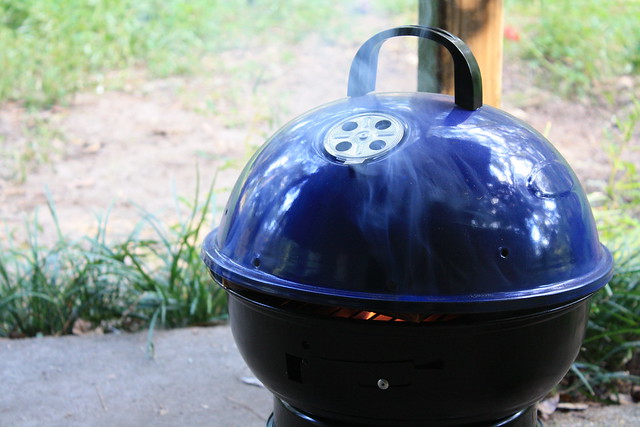
Preheat the grill to medium heat, which should be between 325 - 350*F. Place the plank on the grill and allow it to cook for approximately 15 min, with the cover on. The closer it gets to being done, the more smoke you'll see since the board has lost most of its moisture. Make sure you have a spray bottle full of water next to the grill so you can spray the board if it catches fire.
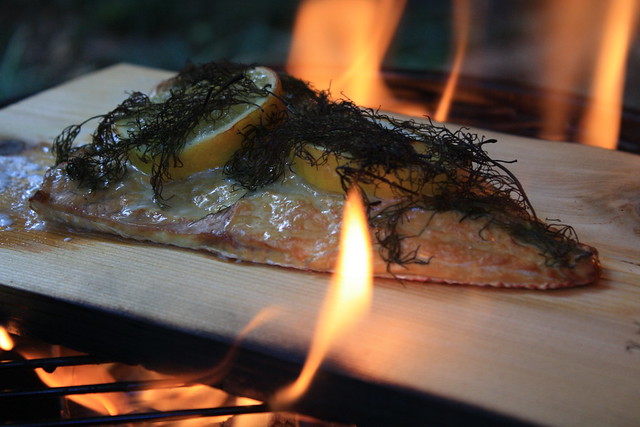
The fillet is ready to eat!
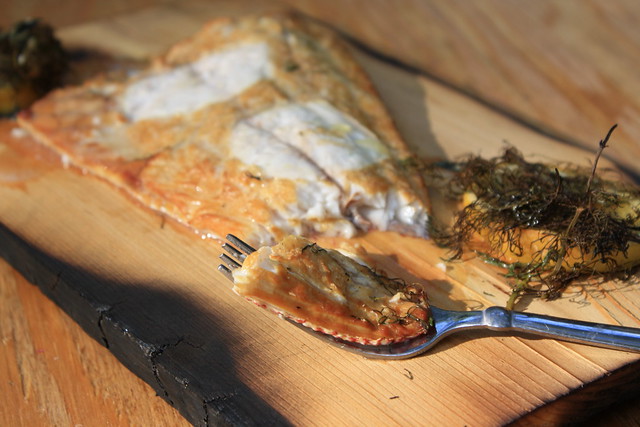
The best part about cooking with cedar planks is you can eat right off the board. Plus, the fish hasn't flaked into the fire or become stuck to the grill. All you have to focus on now is enjoying your work. My favorite pieces are the spots where the lemons sit and drip their juice into the fish. The flaky fish is a perfect balance of smoke, lemon, and dill. It's simple work, but quite pleasurable eating.
When selecting fresh, whole fish, it's important to find one that has clear eyes and a firm body. These are good signs of a healthy fish straight from the water. The red snapper I picked up was gutted on the boat, but otherwise cleaning and filleting it was up to me - which is how I like it. It's so nice to be outdoors, preparing my dinner from scratch. I love getting to watch my dog play around outside and seeing her intrigued by what I'm doing. Not often am I able to slow down and appreciate the little things, and this process takes me back to my childhood and simpler times. It's a skill I'm proud to know.
Smoking fish on cedar planks goes back at least hundreds of years, which is what many Native American tribes in the Northwestern United States are known for. The smoking process infuses a natural and richer flavor into the fish. Although salmon is best known for smoking, cooking over a fire with a cedar plank can be used for both meats and vegetables. I decided this would be a fun way to cook my red snapper, and give me another excuse to use my little grill before it gets too cold.
It's usually easier for me to visit a local hardware store and have a piece of cedar cut. I have found it's cheaper and the pieces can be cut specifically for the size of your grill. My plank is 12 inches by 7 inches, just big enough for one fish fillet. Always remember to ask for untreated wood that has no chemicals added or sprayed on at all no matter your source. It's possible to reuse the wood as long as it's not too charred or cracked, too.
Allow the wood to soak for at least four hours, although soaking the night before is best. I start with hot water to make sure the wood expands to soak up as much liquid as possible. Just place something heavy on top to keep the wood submerged.
To fillet the fish, I'm used to working outside. The clean up is easier and all the little fish scales that go flying are acceptable outdoors. The photos below are not bloody since the innards were already removed, but in general, filleting a few fish isn't very gory. The tools that you need to fillet are a pair of scissors, pliers, and a sharp, flexible knife.
When you're ready to start, begin by removing all the fins.
Red snappers have sharp spikes that need to be removed to make sure you don't get poked.
Go carefully and just snip them off, and do not rub your hand where the fins were since it's still sharp. You're just trying to get the fins out of the way, not make the area smooth.
Make sure you get all the fins on both sides.
Next, use the back of your knife to descale the fish on both sides. Just rub the back of your knife quickly towards the fish head. This is the opposite direction of the scales and it will pop them off.
Use your hand to feel the skin and make sure they're all gone. Go ahead and lift the fish up a little or turn it if needed to get all the scales by its belly and dorsal fin...er, where the dorsal fin used to be.
At this point I like to hose down my workbench to make sure none of those little scales stick to the fish fillets since they are hard to see.
Next, use your knife to make a clean cut through the fish just behind where you removed the pectoral fins. Then make a firm cut through the spine to completely remove the head.
Now it's time to cut your first fillet. Take your knife and cut from the front to the fin, right at the spine. The first few strokes will be the toughest since you'll be cutting through the ribs.
Keep the blade at the spine and try to slice with as little sawing motion as possible to not rip the fillet.
Congrats! You've made your first fillet.
Next, leave the fish as is to make the second fillet.
For this cut, also remain at the spine and try to keep the blade pointed up to remain at the spine.
Great job! Your second fillet.
The fillets have some ribs which need to be removed. This is important to feel around and make sure you get them all. You can either use pliers to remove the pin bones, or...
You can slice off the piece with the ribs and use it to make fish stock along with the head and spine.
 |
| You see those bees in the background...they would not leave me alone! No flowers here - shoo! |
The skin of the red snapper is edible, but you're welcome to remove it if preferable. Just keep the fillet flat with the skin on the board. Take a sharp knife and slide it along the very bottom to remove the skin. Some pieces may remain which can be cut off.
Now we're ready to cook your fresh fillets of red snapper. Remove the cedar plank that has been soaking in water and lay the fillet skin side down. I like to top mine with lemon slices and dill, but you're welcome to use any seasoning you like.
Preheat the grill to medium heat, which should be between 325 - 350*F. Place the plank on the grill and allow it to cook for approximately 15 min, with the cover on. The closer it gets to being done, the more smoke you'll see since the board has lost most of its moisture. Make sure you have a spray bottle full of water next to the grill so you can spray the board if it catches fire.
The fillet is ready to eat!
The best part about cooking with cedar planks is you can eat right off the board. Plus, the fish hasn't flaked into the fire or become stuck to the grill. All you have to focus on now is enjoying your work. My favorite pieces are the spots where the lemons sit and drip their juice into the fish. The flaky fish is a perfect balance of smoke, lemon, and dill. It's simple work, but quite pleasurable eating.