Showing posts with label Blueberries. Show all posts

Wednesday, June 16, 2010

Green Meadows Farm - Blueberry & Lemon Sweet Tea

Ahhh, blueberry season. A great time of year to welcome summer by picking your own berries. Blueberries are wonderful since they are not overly sweet and can be center stage or compliment any type of dish, sweet or savory.
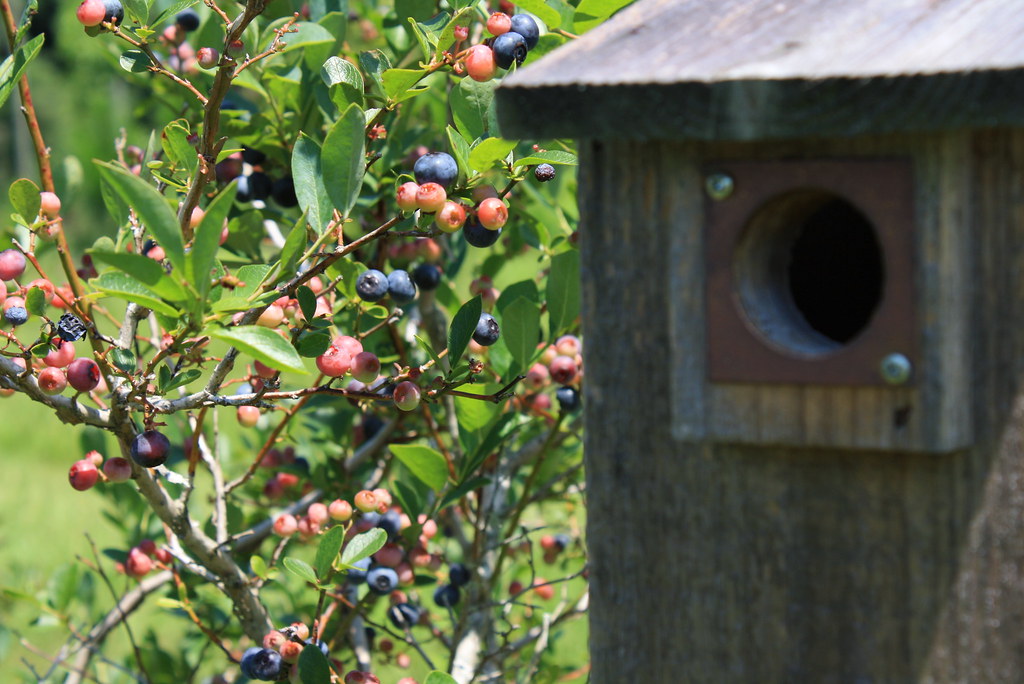

Blueberries are one of the best antioxidant raw fruits with an abundance of different nutrients that can help the body fight free radicals, maintain healthy brain function, and maintain a healthy digestive system, including preventing cancer.
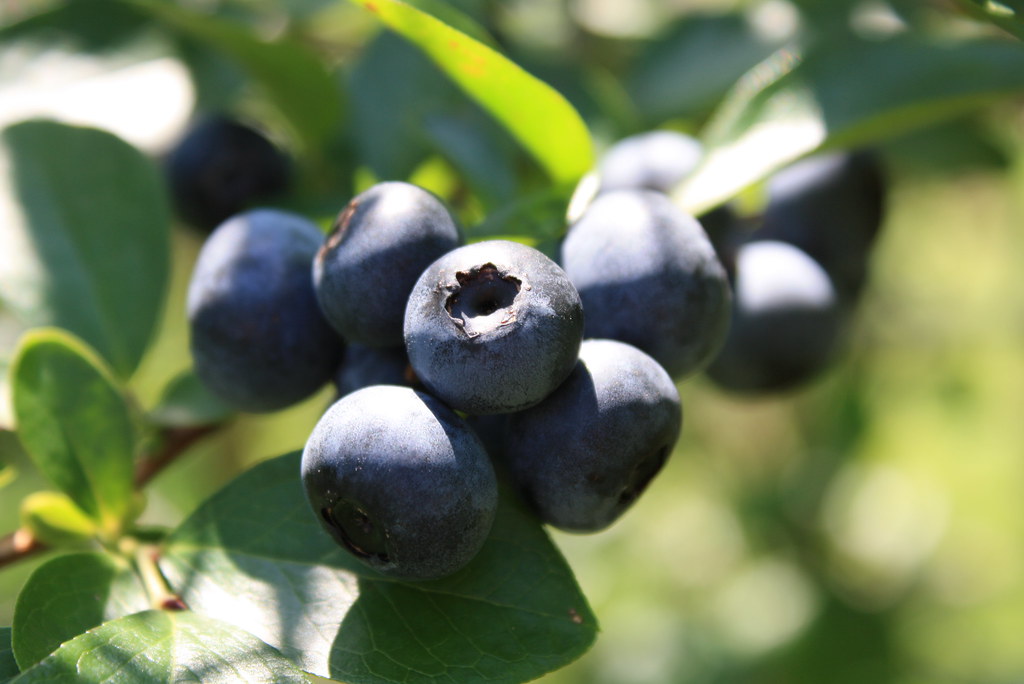

To enjoy all the healthy, and tasty, benefits blueberries have to offer, it's essential to find a trusted source. Luckily, an organic farm is only a short drive away from my town, where I can pick to my heart's content.

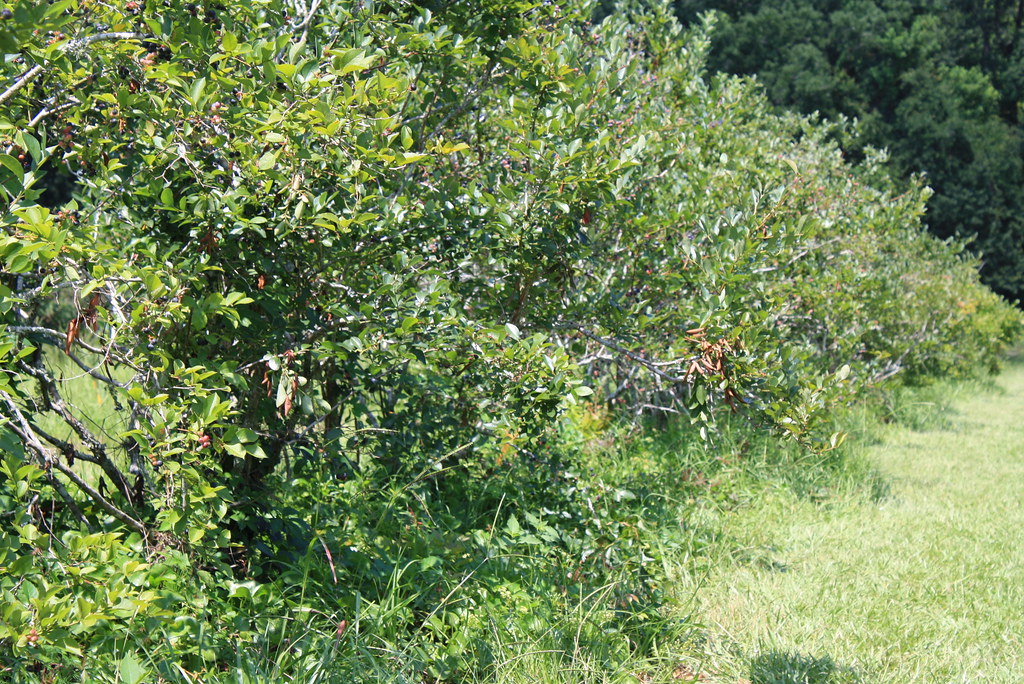
The season was a little late this year compared to last, but the blueberries were out in full force. The bushes were overflowing with blueberries and they have been as delicious as ever. The berries were so plentiful this year, each time I was able to get pounds from any bush I chose. Their farm is so clean and vibrant in the full sun. No bugs to bother me while I'm picking and just the sound of the wind washing over the trees. Once I got the berries home, I've even been sneaking some straight from the freezer since they have the consistency of sorbet that way.

I went three weekends this year and was able to get to know my farmers better each time. The Greens' have been farming organic blueberries for just under a decade and love what they do. Both are quite knowledgeable about organic farming and foods, and were happy to talk to me more about their farm.

The Greens' are so sweet and value enlightening their customers about the health benefits of blueberries and the organic practices of their farm. Delores knows her farm well and can point you in the right direction in the field to get the best berries. It was a pleasure speaking with her and hearing stories of introducing people to organic berries. The Greens' love seeing families come to pick berries so younger generations can learn the value of where their food comes from. Ronny takes pride in the work they put into the fields to keep chemicals from their land. He has stories that go way back in their family history and knows the ins and outs of farming. It's great to see a couple putting effort into keeping traditional practices alive, even if the work can be difficult.
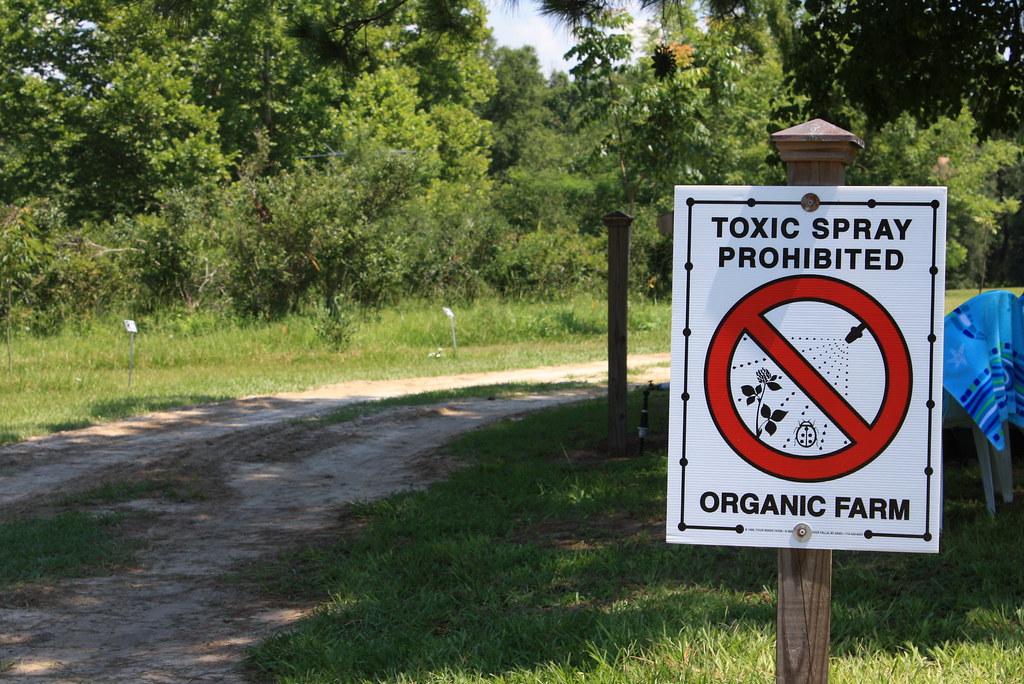

Green Meadows Farm, named after their family and the beautiful land, has its organic certification from the USDA which doesn't come cheap. In fact, the price has skyrocketed in the past few years. They are aware of many farmers who grow organic products and would love to market them as such, but cannot afford to pay the government for certification. The ability to maintain this status requires diligent work to keep thorough records of sales, blueberry quantities, and preparation for inspections. A pound of their juicy blueberries is only $3.25. Comparatively, in local organic stores, 6-8 oz of blueberries sells for $5 to $6. Plus, the Greens' allow you to eat blueberries for free while out picking in the field, which allows their customers to try their product directly from its source and get a tasty snack in the process.

While they have been approached by corporations to sell their crop for commercial purposes, the Greens' prefer to allow locals to enjoy the benefits of organic blueberries directly. I am very thankful for their dedication to a local, sustainable, organic product and hope they are able to continue providing their blueberries for years to come to the surrounding communities. The Greens' enjoy meeting their customers directly to talk about their blueberries, share recipes, and share the happiness of providing blueberries and other connections to local, organic farms.

In fact, a past customer shared with Delores a recipe for blueberry sweet tea, which she has tweaked and made her own. A pitcher of this sweet, refreshing tea awaits after returning from picking in the warm field. She graciously shared the recipe with me, which I highly encourage you to make. Even for the South, it's a unique tea that wins rave reviews. So be sure to find a local farm to enjoy the benefits of local produce and the chance to get to know your farmers. Plus this tea will entice and hold you over while you look.


Blueberry & Lemon Sweet Tea
7 cups water, separated
2 family size tea bags (or 6-8 regular size tea bags)
1/2 cup turbinado
1/2 cup blueberries, puréed
1 can frozen organic lemonade concentrate
1 lemon, sliced

Boil 3 cups of water and steep the tea bags for 10 min. Discard the tea bags and add the turbinado and puréed blueberries, stirring well. Add lemonade concentrate and stir until combined. Add the remaining 4 cups of water and lemon slices. Chill before serving.

~Yields 9 cups.

~Recipe by Delores Green.

Thursday, December 31, 2009

Aebleskiver

One of my Christmas presents was an æbleskiver pan and some wild blueberry jam courtesy of my youngest sister. I love learning about new culinary treats, so part of the fun was looking up the history of this foreign treat.

The origin is believed to be Denmark, roughly around the time of the Vikings. The word æbleskiver is plural meaning apple slices, believed to be the original filling; although other sources claim it's an ode to the spherical shape of the pancake. Either way, it's delicious.

The Danish usually enjoy their æbleskiver as a dessert or snack in December, with fillings ranging from pieces of fruit, to jams and jellies, to chocolates. The batter is also perfect for savory fillings, such as meats or marinated vegetables. In America, æbleskiver are more often made for breakfast and drenched in maple syrup.

For my version, I used wild blueberry jam and some orange marmalade. The wild blueberry was our favorite. The orange marmalade was too tart for our taste buds.

The batter reminded me of thick eggnog and smelled wonderful. This was also my first time beating eggs whites by hand. It took a few minutes of furious whisking, but I did it! I found it helped to pace back and forth in the kitchen throughout the process.

I didn't realize how many æbleskiver would result from the recipe, and it turns out we ended up with 42 for just the two of us! Since æbleskiver do not keep very well, we'll be eating these all weekend. Next time I'll just cut the recipe in half.

The æbleskiver do taste similar to a pancake, but the nutmeg brings a lovely warmth to the flavors. I would recommend eating these warm, right as they come off the pan. Try them plain or with just powdered sugar first before they become drenched in syrup and the flavors become overwhelmed.

The only catch to making these is you have to have an æbleskiver pan (or a takoyaki pan), otherwise you'll just be making pancakes.

Æbleskiver

4 eggs, cold, yolk and whites divided
2 cups all-purpose flour
1 tsp baking soda
1 tsp baking powder
1/2 tsp nutmeg
1/2 tsp salt
2 tbsp turbinado
2 cups buttermilk
1 tsp vanilla

stick of butter
chopsticks

Separate the egg yolks from the whites. Place the egg whites in a medium sized metal bowl and whisk until stiff peaks are formed.

In a large bowl, sift together the dry ingredients (flour through salt) and set aside. In a mixing bowl, cream together the egg yolks and turbinado. Add the buttermilk and vanilla to the mixing bowl, and then slowly add the dry ingredients until just combined (some small lumps may remain).

Using the whisk, add the egg whites to the batter and carefully fold together.

Place the æbleskiver pan on the stove on medium-low heat and allow it to get warm. Take the stick of butter and quickly rub into each divot. Using a spoon, pour 1 tbsp of batter into each divot. Next add 1/2 tsp of filling to each divot, then top with 1 tsp of batter, making sure to cover the filling completely (try and keep the filling from touching the sides, otherwise the æbleskive will have a hole in it). Do not fill each divot to the brim as it needs room to puff up.

After 2-3 min, use a pair of chopsticks to quickly flip the æbleskiver over to finish cooking. The second side will only need 1-2 min of cooking. Remove to a plate and top with powdered sugar.

~Yields 42 æbleskiver.

Saturday, July 11, 2009

Boundless Blueberry Bushes

While preparing my next post, I came across these photos taken while picking blueberries a few weeks ago.


I was not aware of any organic farms in the area until another food blog led me to this discovery. I was suddenly overwhelmed by all my options. I knew I had to get my hands on these organic and farmed raised foods. I made plans to go to Monticello the next day before all the blueberries were gone since the picking season was almost over. I knew my fiancé would have no problem coming along to help since blueberries are his favorite.

The farm I chose to visit first is owned by a retired couple, Ronny & Delores, who enjoy providing organic foods to locals. They had a cute personal garden, complete with a little white fence to keep any mischievous creatures at bay, next to their home. The blueberry bushes in the "backyard" were too numerous to count; many more than I expected. Delores was glad to see some new faces, but warned us most of the plump, juicy ones were gone. She did say we'd probably get lucky since we can reach the top of the bushes (we're both pretty tall) and get the ones others have to leave behind. She gave us two wooden baskets and we were off!


I was afraid we'd have to scour the land for some good bushes, but we were able to find plenty of berries on the first row we came to. The bushes were still producing new buds, too.


The best thing about picking from organic farms is the all-you-can-eat policy! It's a wonderful thing seeing where your food comes from.

Another bonus to getting to know your farmers is the community they are a part of. I was able to snag some fresh eggs from a nearby farm who leaves a few cartons daily with Delores.


Opening the carton felt like unwrapping a Christmas present. Each egg was a different color and size and shape. They're beautiful. It's also a good feeling knowing these eggs came from hens who are healthy, happy, and well taken care of. Ironically, when I was a little girl, I had access to fresh eggs, but was afraid of them. I thought they were dirty since they were plucked from a nest and did not look bright white like the ones from the grocery store. I might have started eating differently a lot sooner if my family had taken the time to explain to me the value of fresh foods. I found my way though, so it has all worked out.

When we got home, I washed and froze the blueberries right away. Instead of throwing them all in a bag, I found a great tip online: dry the blueberries after washing and spread them out on a cookie sheet (with a lip preferably); then place the sheet in the freezer until the blueberries are firm. Then they can be stored in a bag. By taking this extra step, they will not be frozen in a big clump and you can take only the amount you need when it's time to use them. This came in handy when baking cheesecake for the 4th of July (the eggs I also used in the recipe are the ones you see above).

We gathered 2 lbs that day, and still have 1 1/2 lbs left. I would hate to use them all up so quickly, but it's very tempting. When we go next year, I'll be ready early so we can get twice as much.

Saturday, July 4, 2009

Happy (Feasting on The) 4th of July

Happy Independence Day! I hope you're able to enjoy the holiday relaxing and with the ones you love. My fiancé and I will be out on a picnic watching the fireworks tonight. Hopefully, some of our friends will get a chance to join us. It's sometimes difficult to convince people to venture outside in the Florida heat. Once we told them what was on the menu though, they signed right up.

I'm the nostalgic type and like thinking about our nation's history on days like today. I try not to take what I have for granted, and am grateful for all Americans who have sacrificed for our freedoms. I love having so many choices for enjoying the things I love - one of those being food. Three years ago I began researching the history of food in this country. The rapid changes made within the last half-century caused me to stop and think about what we are doing. I decided to start eating local, organic foods, and believe I'm healthier for it. I'm grateful I have that choice, the freedom, to choose something so important for myself. My cooking has come alive since I've started using organic ingredients. The flavors are so clean, and fresh. I was able to taste the difference immediately between the same dishes I had cooked before and then after I began using natural foods. I love being able to taste every item I've put into a dish and not have any of the flavors covered up by artificial ingredients. I no longer feel guilty feeding my loved ones foods I know we shouldn't be eating. Therefore, the ingredients I list in my recipes are organic and I hope to inspire you to try some, too.

When choosing this holiday's menu, I knew we were going to be outside for several hours in the sun. I wanted to choose foods that would be safe outdoors in a cooler, and contain high water content since dehydration can happen quickly and be dangerous. I also wanted dishes that are lighter than the usual breads, potatoes, and the like. It's still a party though, so the idea was to keep the dishes fun and delicious.

And I also got to go shopping for some new items! I usually write things down on lists to help me remember - my thoughts tend to be scattered at times. I was sure I'd be able to keep track of three little things. Oh, how wrong I was. I had to go to the store three separate times for each item! Thankfully, it's right up the block and each trip made me feel like I bought more than I really did. This time (or times actually) I picked up a 13-by-18-inch pan, a zester, and a sifter. I'll have to think of more things to bake with my extra-large pan. Yummy.

Eat up!

Papaya & Pineapple Salsa in Cucumber Cups
Printable Recipe

4 large, straight cucumbers
1 ripe papaya, finely chopped
1 pineapple, finely chopped
1/3 cup bacon, finely chopped
1 tbsp capers
1 tsp freshly ground black pepper

Using a zester, remove the cucumber skins in different patterns.


Cut off each cucumber end and then in half. Next cut each half once, which makes 4 cups per cucumber. Using a small, sharp knife, cut a cone into a cup, remembering not to reach the bottom. Then even the sides to create room for the filling.

(If you choose to make smaller cucumber cups, I would recommend scooping them with a melon baller rather than attempting to hollow the centers with a knife. Also, if the bottom of a cup is accidentally cut away, it can be plugged with a cucumber strip and still hold filling.)


Combine the rest of the ingredients in a bowl and toss gently. Fill each cup and use the cucumber skins for decoration if desired.

~Original recipe by Brie.


Crab, Corn, & Tomato Salad with Lemon-Basil Dressing
Printable Recipe

1 tbsp grated lemon rind
5 tbsp freshly squeezed lemon juice
1 tbsp extra virgin olive oil
1 tsp honey
1/2 tsp Dijon mustard
1/4 tsp salt
1/8 tsp freshly ground black pepper
1 cup fresh corn kernels
1/4 cup freshly chopped basil leaves
1/4 cup chopped red bell pepper
2 tbsp finely chopped red onion
1 lb lump crab meat
2 3/4 cup chopped tomatoes, 2 varieties

Combine all ingredients in a large bowl and toss gently.


This dish was heavy on the crab, so a 1/2 - 3/4 lb fresh crab meat would be fine. Also, the flavors in the dish were not very pronounced. After a taste test, I decided to double the olive oil, honey, Dijon mustard, and pepper, which made a difference (this is not reflected in the amounts above). Adding more spices or more powerful ingredients, such as avocado, would make it even tastier.

~ This is a Cooking Light recipe.


Mango & Black Bean Salad
Printable Recipe

1 1/2 cups cubed mango
1 cup finely chopped green onions
1/2 cup cooked wild or brown rice
3 tbsp fresh cilantro
2 tbsp fresh salsa or tomatillo
2 tbsp freshly squeezed lime juice
2 tbsp extra virgin olive oil
3/4 tsp salt
1/4 tsp freshly ground black pepper
1 can no-salt black beans, rinsed and drained

Combine all ingredients in a large bowl and toss gently.

This dish can be served chilled or warm by serving right after the cooked rice is added.

~This is a Cooking Light recipe.


Fruited-Cheesecake Flag
Printable Recipe

3 cups all-purpose flour
Coarse salt
12oz (3 sticks) unsalted butter - room temperature
1 cup + 2 tbsp light brown sugar
32oz cream cheese - room temperature
1 1/2 cups sugar
1 tsp finely grated lemon zest
1/2 tsp vanilla extract
1/4 tsp almond extract
4 large eggs - room temperature
6oz (1 1/2 cups) blackberries
9oz (2 cups) blueberries
12oz (3 cups) raspberries

Preheat the oven to 300*F. Use the 4th stick of butter that comes in the box to coat a 13-by-18-inch pan. Line the pan with parchment and leave a few inches of overhang on both short ends. Then coat the parchment with butter.


Cream the butter in a mixer on medium-high speed for 5 min. While the butter is busy, sift the flour and 1 3/4 tsp salt in a bowl. Next, lower the mixer to a medium setting add the light brown sugar to the butter in a slow, steady stream, and allow it to blend together for 2 min. Stop the mixer and scrape down the sides. Turn back on to a low setting and add the flour mixture, beating until just incorporated.

Transfer the dough to the center of the baking sheet. Using a piece of parchment the size of both hands, use your palms to spread the dough evenly around the pan. Be careful not to pull at the dough, as this will cause it to tear. Refrigerate for 20 min. Once chilled, bake the dough for 40 min. (With this downtime, wash the mixing bowl and beater for the filling.) Then remove from the oven and set the crust aside to cool completely. Raise the oven temperature to 350*F.

Beat the cream cheese in a mixer on medium speed for 3 min. Reduce the speed to low and add the sugar in a slow, steady stream. Stop the mixer to scrape down the sides. Turn back on to a low speed and add the lemon zest, vanilla and almond extracts, and a pinch of salt. Next add the eggs, one at a time. Stop to scrape down the sides one more time and turn back on for a moment to just incorporate ingredients.


Pour the mixture over the crust and spread into an even layer (you might need to wiggle the pan to remove any air bubbles). Bake for 25 min. Remove from the oven and allow the cheesecake cool completely. Then refrigerate until firm, 4 hrs to overnight.

Run a sharp knife along the long sides of the cheesecake. Carefully pull up the four corners of the cheesecake to loosen. Then grip the parchment and carefully lift the cheesecake out of the tray onto a flat surface. Using a sharp knife, cut the cheesecake into 48 squares - 8 vertical cuts and 6 horizontal cuts. Make sure to clean the knife after each cut to prevent the filling from tearing. Martha's Tip: you can use unflavored floss to mark straight lines before cutting.
(Note: I found the crust difficult to cut once the cheesecake was chilled, which also tore the filling. I would recommend cutting the cheesecake after allowing it to rest for 10-15 min once it has been removed from the tray.)

Transfer the cut squares to a serving platter. Decorate the top left squares (3 down, 4 across) with a blackberry in the center, surrounded by blueberries. Beginning with the remaining top row squares, and every other row thereafter, adorn with raspberries. Finally, dust the empty squares with powdered sugar or top with halved strawberries dusted with powdered sugar. To prevent the other rows from being dusted, you can choose to remove the squares and replace them once covered, or use paper towels to carefully cover the berries while dusting the rows. Make sure to dust thoroughly as the powdered sugar will seep into the cheesecake filling.